Diagnostics
Instructions for collecting ZloyRouter diagnostic logs
Please follow these steps on your Raspberry Pi to collect diagnostic information (read to the end). This will help us solve the issue.
Attention! We value your privacy and do not collect any data without your knowledge!
In order for logs to be collected, written to disk, and survive a device reboot, you need to run ZloyRouter in persistent logs mode:
sudo ./zloyrouter -journald-persistent enable
After that, repeat the actions that led to the error and proceed to collect the logs.
Part 1: Collecting logs on Raspberry Pi
- Connect to your Raspberry Pi via SSH.
Windows: Use the PuTTY program or the built-in SSH client in PowerShell/CMD (Open the Start menu, type Windows PowerShell, select Windows PowerShell, and then click Open) and enterssh pi@192.168.0.5(replace 192.168.0.5 with the actual IP address of your Raspberry Pi)
macOS/Linux: Open the Terminal and run the command ssh pi@<your_Raspberry_Pi_IP_address> (replace pi with your username if it's different, and
2. Create and run the log collection script.
Enter the command: zloyrouter-diag.sh
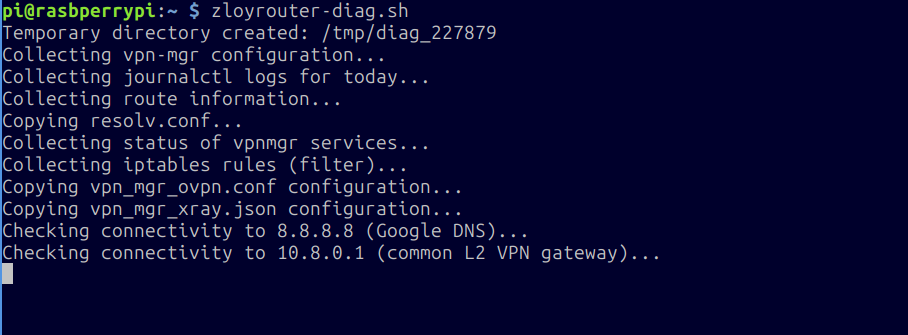
3. Wait for completion.
The script will start collecting information. This may take some time (a minute or two at most). You will see progress messages.
Wait for a message like:
Archive created: /tmp/vpn_mgr_diag.YEARMONTHDAYHOURMINUTESECOND+OFFSET.tar.gz
Temporary directory /tmp/diag_XXXXX will be deleted after reboot. (where XXXXX is the process PID)
Proceed to Part 2: Downloading the log file from Raspberry Pi.
Upon completion, an archive file with logs will be created in the /tmp/ directory on your Raspberry Pi, for example, vpn_mgr_diag.20231027153000+0300.tar.gz (the date and time will be current).
Part 2: Downloading the log file from Raspberry Pi
You will need an SFTP client to download the file.
For Windows (using FileZilla):
- Installing the SFTP client (FileZilla):
Download FileZilla Client from the official website: https://filezilla-project.org/download.php?type=client
Install the program following the installer's instructions. - Connecting to Raspberry Pi via FileZilla:
Launch FileZilla.
Enter the connection details:
Host:sftp://<your_Raspberry_Pi_IP_address> (e.g., sftp://192.168.1.100)
Username: pi (or your username)
Password: your password (default is raspberry)
Port**: 22
Click "Quickconnect"
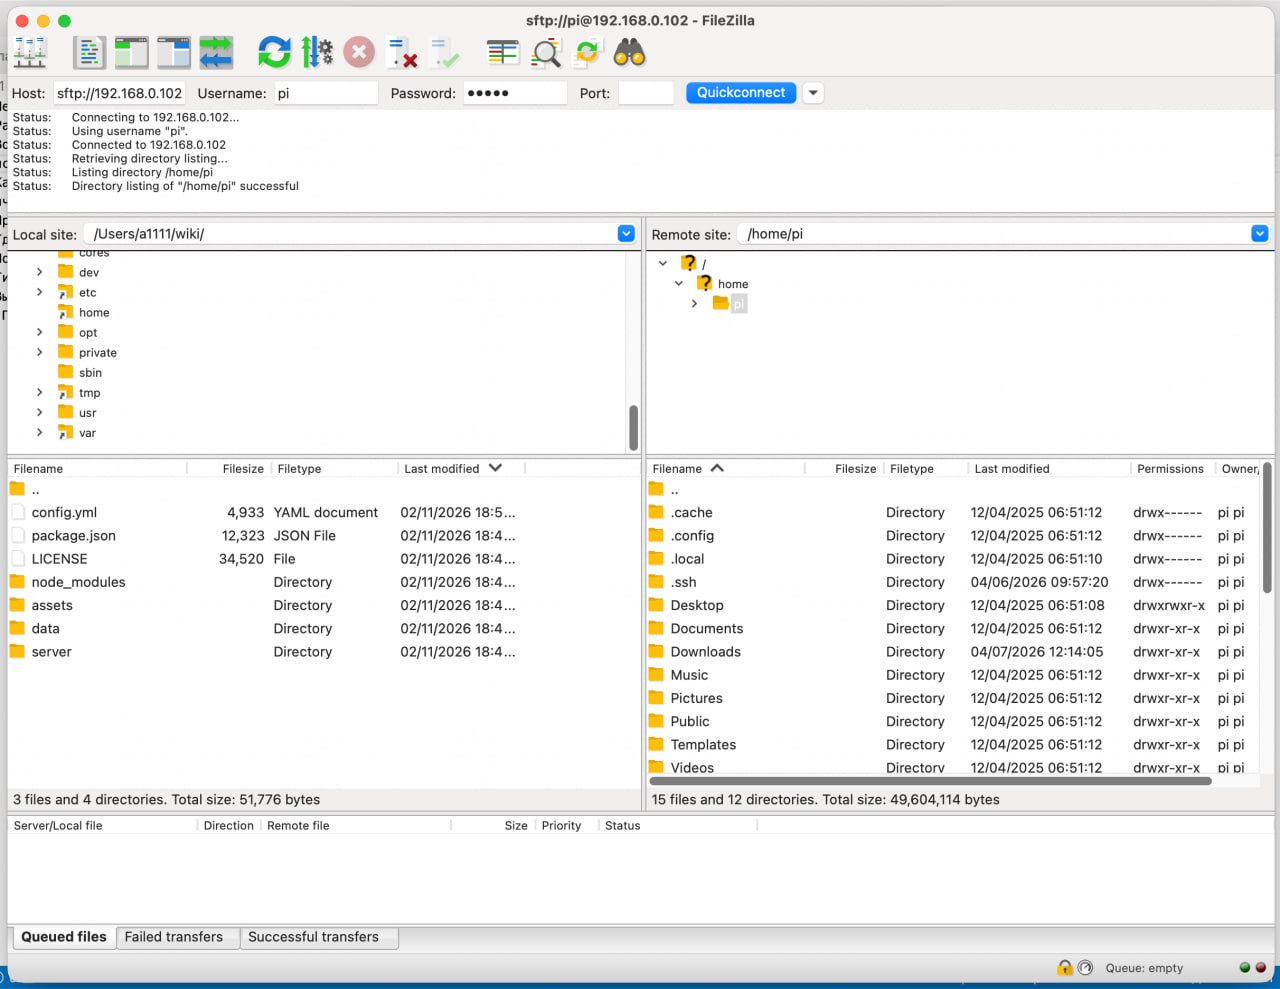
Upon your first login, a key authorization window will appear. Leave the "Always trust this host, add this key to the cache" checkbox checked and click OK.
After that, you will connect to your Raspberry Pi, and in the right pane, you will see the contents of the home folder/home/pi(or/home/<your username>if you specified a username other thanpiduring installation). - Downloading the log file:
In FileZilla:
The left pane displays files on your computer.
The right pane displays files on the Raspberry Pi.
In the right pane (Raspberry Pi files), navigate to the/tmpdirectory.
To do this, in the "Remote site" field, replace/home/pi(or/home/<your username>if you specified a username other thanpiduring installation) with/tmp
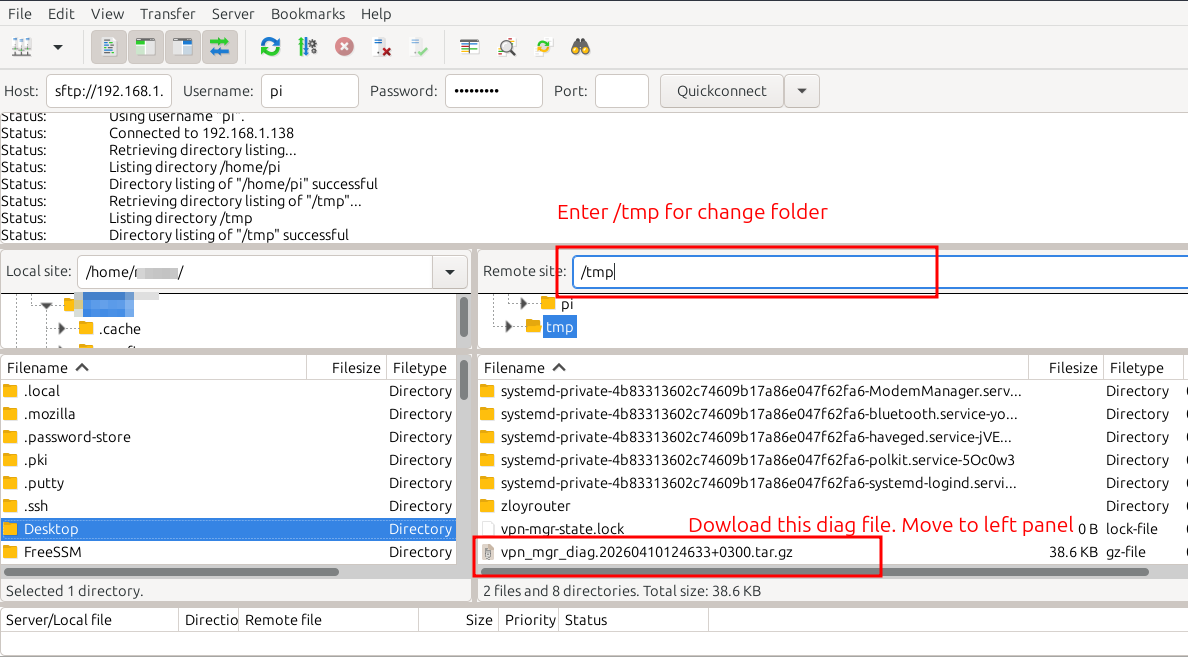
Find a file named like vpn_mgr_diag.YEARMONTHDAYHOURMINUTESECOND+OFFSET.tar.gz (e.g., vpn_mgr_diag.20231027153000+0300.tar.gz).
Drag and drop this file from the right pane (Raspberry Pi) to the left pane (your computer), for example, to your Desktop.
For macOS / Linux (using Terminal):
- Open Terminal.
- Use the scp command to download the file:
Execute the following command, replacingwith your Raspberry Pi's IP address, and pi with your username if it differs. The file will be copied to your home folder.
scp pi@<your_Raspberry_Pi_IP_address>:/tmp/vpn_mgr_diag.<timestamp>.tar.gz .
For example:
scp pi@192.168.1.100:/tmp/vpn_mgr_diag.20231027153000+0300.tar.gz .
Note the dot at the end of the command - it means to save the file in the current directory.
The file name should be taken from Part 1, Step 3.
You will be prompted to enter the password for the pi user (or your user) on the Raspberry Pi.
Note: If there are multiple files starting with vpn_mgr_diag. and ending with .tar.gz in /tmp/ on the Raspberry Pi, the scp command might throw an error or copy multiple files. Ensure there is only one relevant file or specify the exact file name.
Part 3: Sending the file and cleanup
Send the downloaded vpn_mgr_diag.*.tar.gz file to us for analysis.
Delete the log files from the Raspberry Pi (to free up space). Reconnect via SSH if you disconnected, and execute the following commands:
sudo rm /tmp/vpn_mgr_diag.*.tar.gz
sudo rm -rf /tmp/*
Thank you for choosing our software!