Installation
1. Installing the Operating System on Raspberry Pi
1.1. Preparing the Equipment and SD Card
Take the SD card and insert it into the PC (via a card reader or adapter).
Make sure there is nothing important on the card (it will be completely formatted).
For more details about the required equipment, see the hardware selection guide.
1.2. Downloading the Raspberry Pi Imager Utility
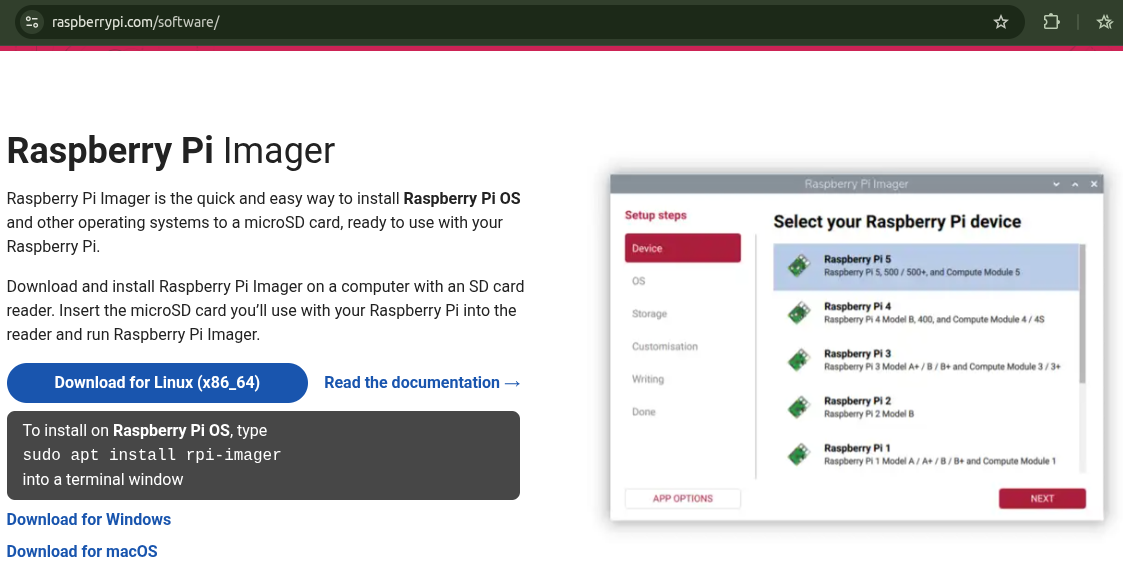
Download the Raspberry Pi Imager program to your computer (Windows, Mac, or Linux):
Go to the Raspberry Pi Imager download page
For Windows
Download the latest version from the Raspberry Pi website. Run the installer.
For MacOS
Download the latest version from the Raspberry Pi website. Run the installer.
For Linux
Download the latest version of the AppImage file and make it executable:
sudo chmod +x imager_<version>.AppImage
or
right-click on the file > properties > permissions > make the file executable
Run the AppImage file. Click on the file or enter in the terminal:
sudo ./imager_<version>.AppImage
If any problems arise with running the downloaded AppImage package, you can try to download the package via:
sudo snap install rpi-imager or sudo apt install rpi-imager
and run it via
sudo rpi-imager
1.3. OS Installation
1.3.1. Launching Raspberry Pi Imager
Launch the Raspberry Pi Imager application in one of the following ways:
- Find it in your application menu.
- Click the Raspberry Pi Imager icon on your desktop.
- Run the AppImage file with administrator privileges. For example, using the command: sudo ./Raspberry_Pi_Imager-2.0.0-desktop-x86_64.AppImage

On the Device tab, select your Raspberry Pi model from the list. Click Next.
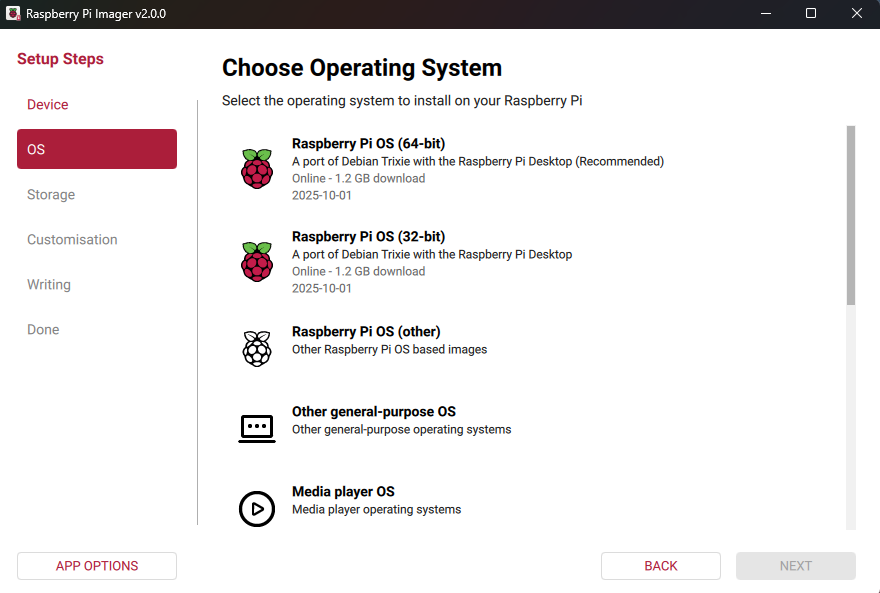
1.3.2. Configuring Basic Settings
- Select the OS image from the list.
-
Select the SD card (“Storage” or “Накопитель”).
On the Storage tab, select the storage device you want to write the image to. Click Next.
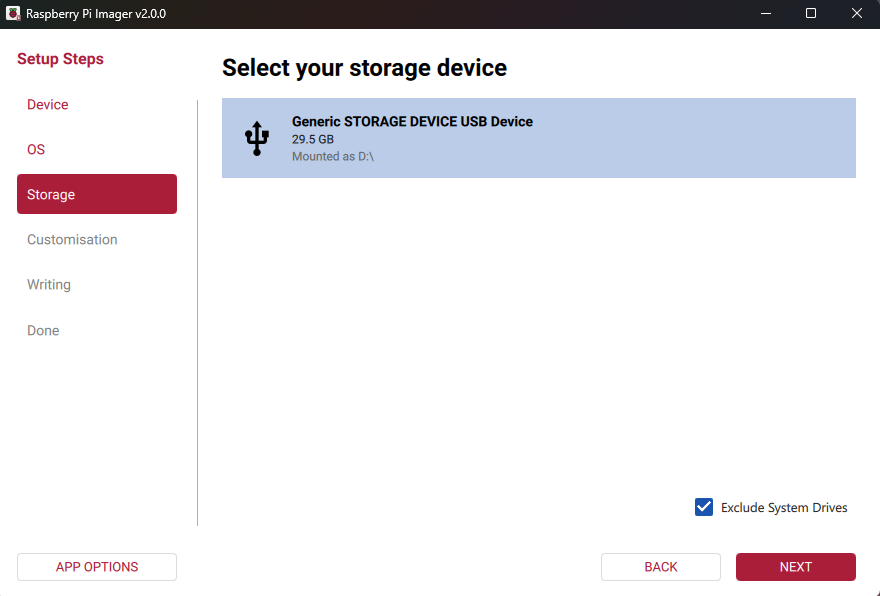
Sometimes, when selecting a storage device, you might see an empty list.
In this case, uncheck "Exclude system drives" and select your SD card.Attention!
If multiple storage devices are connected to your computer, be sure to select the correct device (SD card)! Often, storage devices can be identified by their size. If you are unsure, disconnect other devices until you identify the device you want to image. The Imager program will issue a warning if you attempt to overwrite your computer's system drive.
1.3.3. Operating System Configuration
-
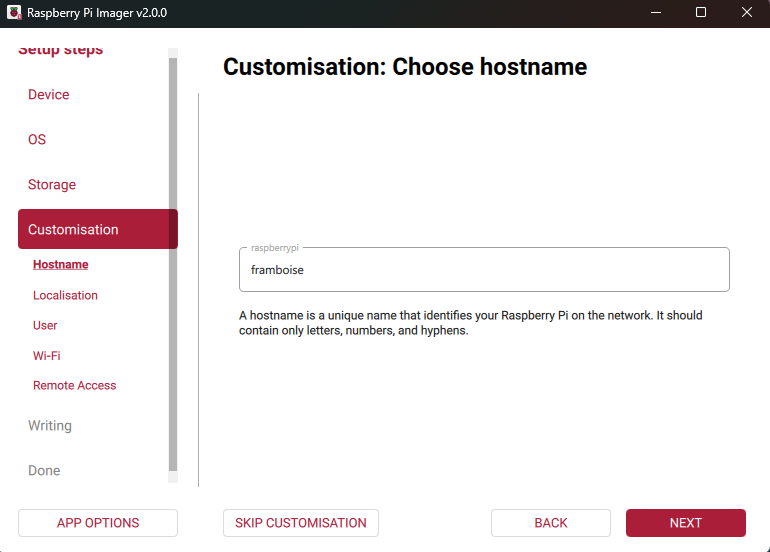
On the Settings > Hostname tab, enter a hostname for your Raspberry Pi, consisting only of letters, numbers, and hyphens. Click Next.
-
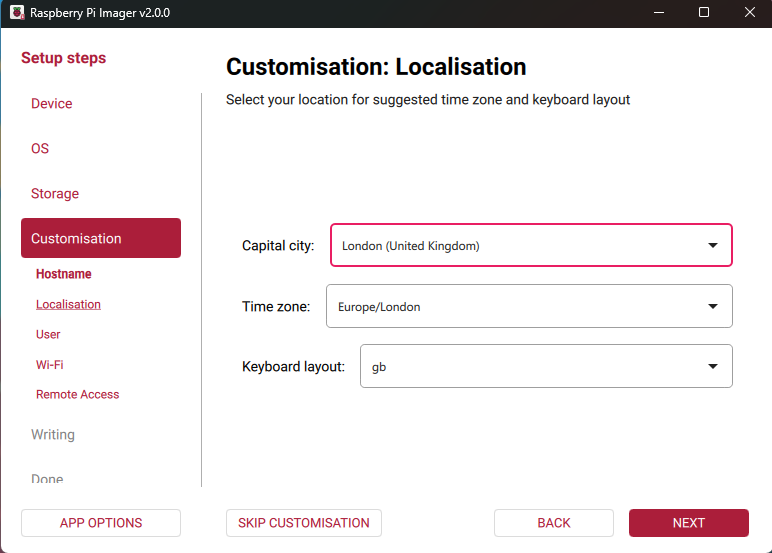
On the Settings > Localisation tab, select the capital of your country. Imager will automatically fill in the time zone and keyboard layout for this city; you can change these settings. Your selection also determines the Wi-Fi regulatory domain; the regulatory domain always corresponds to the selected capital. Click Next.
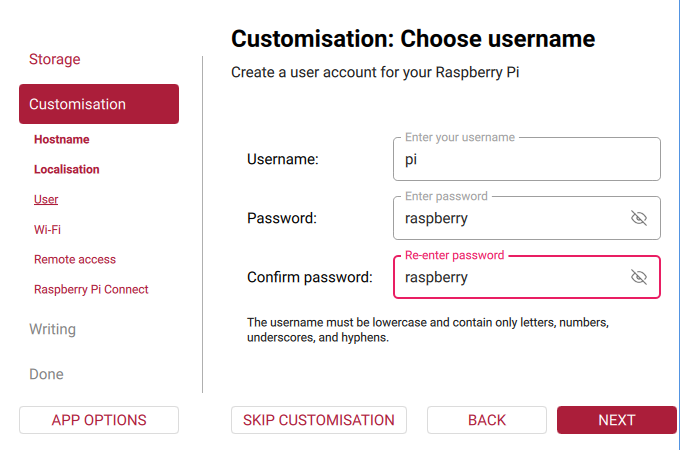
- On the Settings > User tab, enter a username and password (e.g., login: pi, password: raspberry or your own) for the administrator of your Raspberry Pi. Click Next.
-
On the Settings > Wi-Fi tab, upon first use, Imager automatically enters the SSID (name) and password of the Wi-Fi network you are currently connected to.

-
⚠️ CRITICALLY IMPORTANT! You need to clear all settings from this section, so the fields become empty (as in the screenshot below).
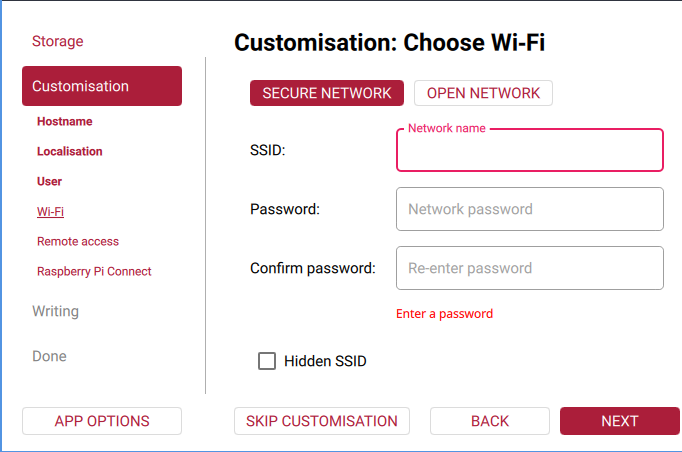
The network settings must be empty,** because we will be distributing Wi-Fi ourselves, rather than connecting to it. Simply connect the Raspberry Pi with a cable to your router so that they are on the local network.Why this is important: The Raspberry Pi has only one built-in Wi-Fi module. It can only perform one task: either connect to a home router or broadcast an access point. If you leave your home Wi-Fi settings here, the Pi will connect to it, and ZloyRouter will throw the error
no available WiFi device foundwhen trying to create its own access point.
Therefore, the network settings must be empty. We will supply the internet to the Pi via cable! -
⚠️ MANDATORY! On the Settings > Remote access tab, configure the SSH settings.
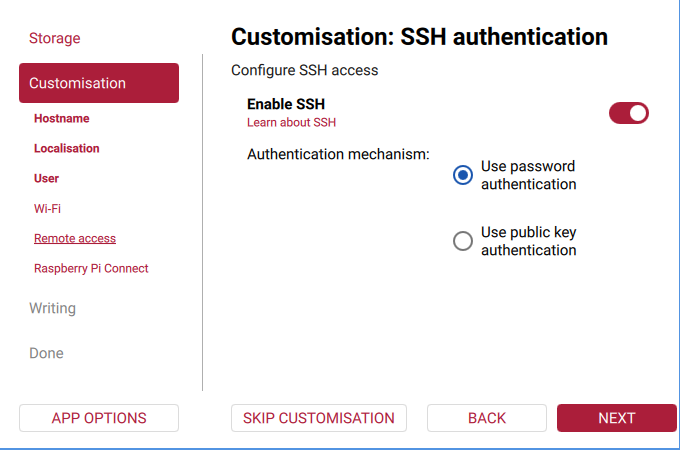
Toggle the Enable SSH switch to the active position and select "Use password authentication".
If you forget to do this, you won't be able to connect to the Pi (the system will output aConnection refusederror). -
Some operating systems now display the "Settings" > "Raspberry Pi Connect" tab.
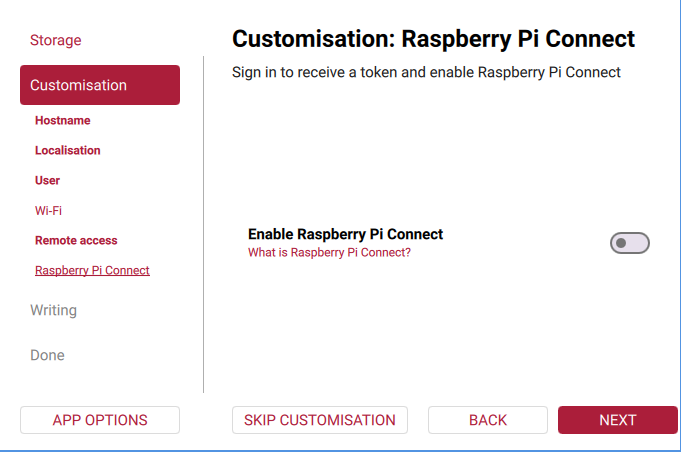
There is nothing to configure here - just click NEXT. -
The final settings should look like this
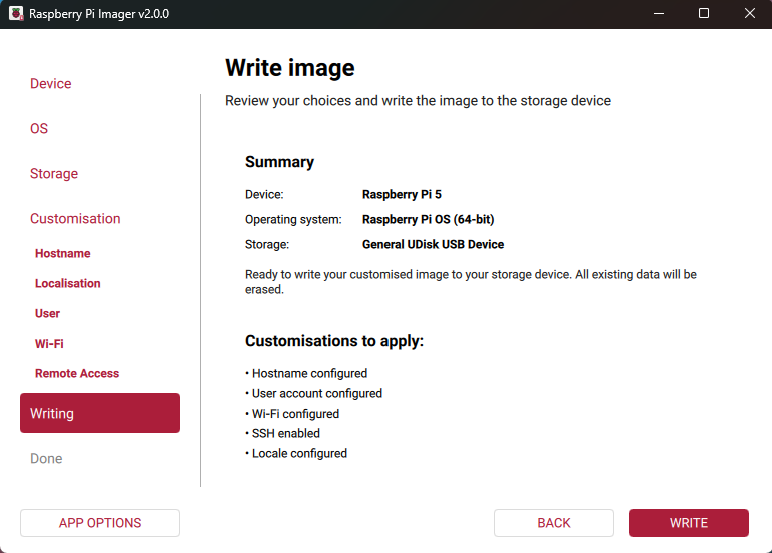
-
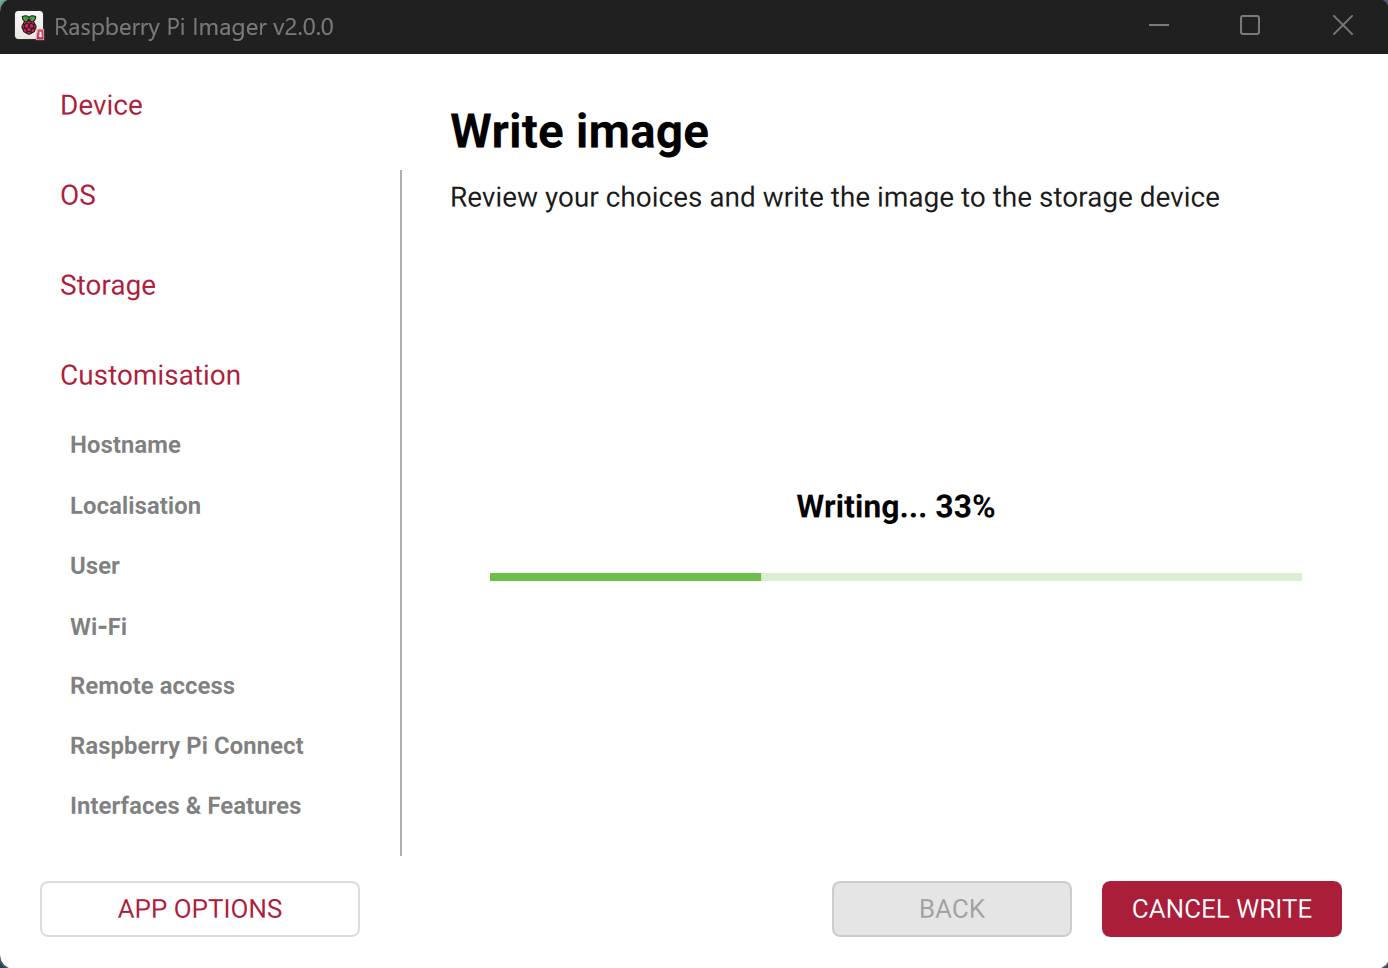
After that, click "WRITE" and wait for the writing process to finish.
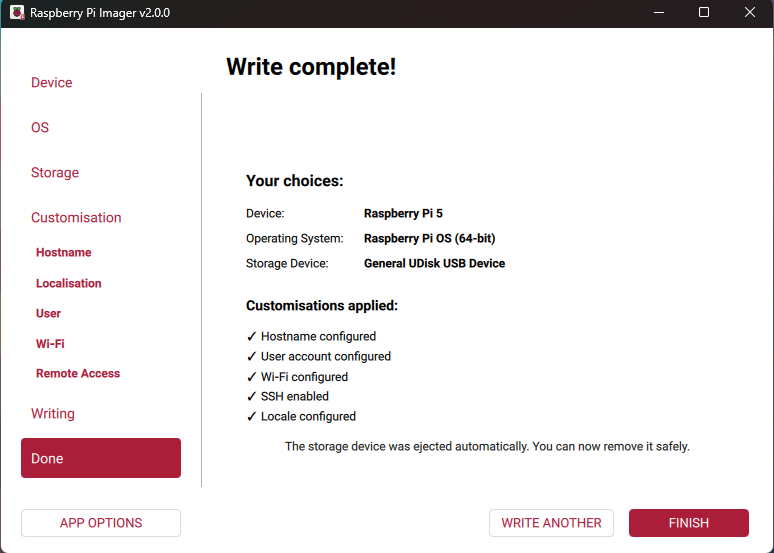
-
When the writing is complete, remove the SD card from the adapter and insert it into the Raspberry Pi.
2. Initial Setup of Raspberry Pi and SSH Connection
For the program to install and check the license, the Raspberry Pi needs the internet.
Options for Connecting the Raspberry Pi to the Internet
There are 3 ways to connect the Raspberry Pi to the internet:
1. Connect via Ethernet cable to the same router your PC is connected to (the preferred and simplest method).
Operation scheme:
graph LR
    A[🌐 Home router] -->|RJ45 Cable| B(🍓 Raspberry Pi <br> ZloyRouter)
    B -->|'Zloy' Wi-Fi network| C[💻 PC / Laptop]

    classDef zloy fill:#e74c3c,stroke:#c0392b,stroke-width:2px,color:#fff;
    class B zloy;
With this connection method, your PC and the Pi end up in the same network, and the router will assign them IP addresses automatically.
- Connect the Raspberry and PC to a mobile network via a 4G modem with Wi-Fi. This is relevant if you are traveling and there is no regular wired router nearby.
Operation scheme:
graph LR A[🗼 4G/LTE Tower] -->|Radio channel| B[📶 USB 4G modem] B -->|USB port| C(🍓 Raspberry Pi <br> ZloyRouter) C -->|Wi-Fi or Cable| D[💻 PC / Laptop] classDef zloy fill:#e74c3c,stroke:#c0392b,stroke-width:2px,color:#fff; class C zloy; - Share the internet from a PC, but this is the most difficult and unstable method, so we do not recommend even trying to use it. It is better to purchase the recommended equipment for the first two options and start working in just 45 minutes.
Below we will discuss the listed methods in more detail.
How to Find the IP Address of the Raspberry Pi on the Local Network (via router or 4G modem)
Important rule before starting: Your computer (or smartphone) and the Raspberry Pi must be connected to the same network (to the same router or the 4G modem's Wi-Fi network).
Method 1: Name Instead of Numbers (Fastest)
If you have the standard Raspberry Pi OS installed, you don't even need to know the numerical IP address. The device announces its name to the network itself.
1. Open the command prompt on your computer (press Win + R, type cmd, and press Enter).
2. Enter the command:
ping raspberrypi.local
(If you specified a different device name when writing the flash drive, type it instead of raspberrypi).
3. If the Pi is on the network, replies will start. In these lines, you will see its numerical IP address (for example, 192.168.1.45 or 192.168.8.100).
4. To connect via SSH, you can use this name directly:
ssh pi@raspberrypi.local
This is the simplest method, but due to Windows network security settings, it does not always work. If it didn't work - try the methods below.
Method 2: Via the Router / 4G Modem Control Panel (Most Accurate)
Since the router (or 4G modem) distributes the internet, it knows exactly who it assigned which IP address to.
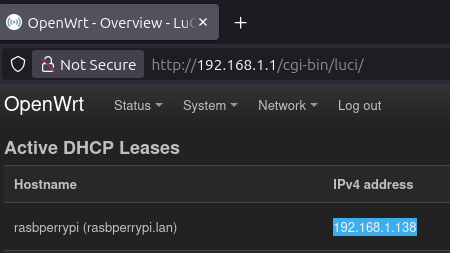
On OpenWRT:
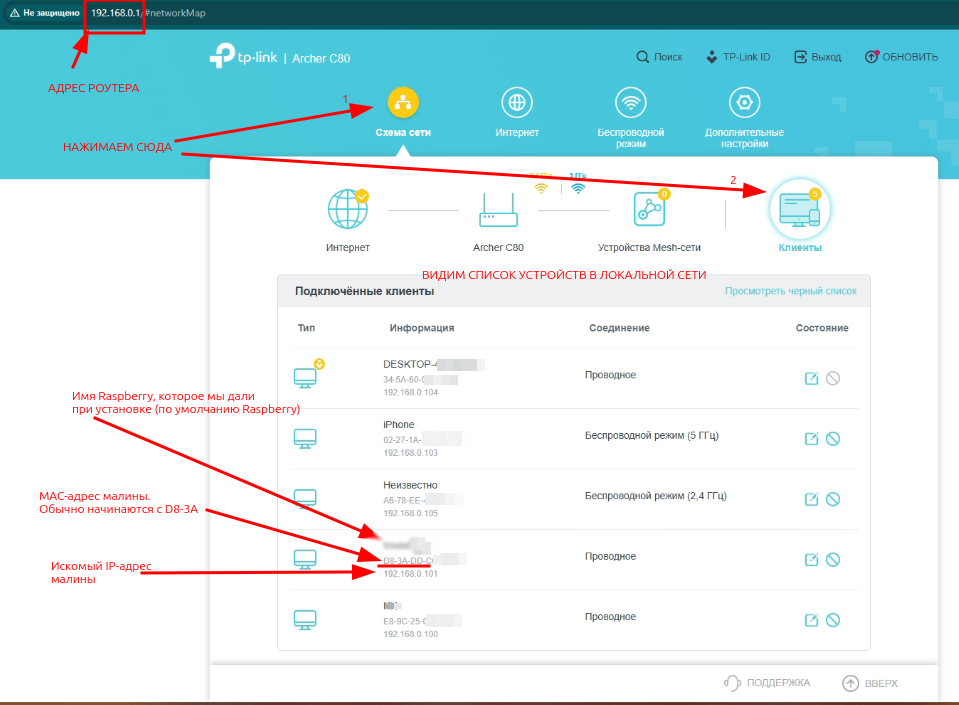
On TP-LINK routers:
1. Open a browser on your computer or smartphone.
2. Go to the router settings. Usually, this is the address 192.168.1.1, 192.168.0.1 (for home routers) or 192.168.8.1 (often used in Huawei/ZTE 4G modems).
3. Enter the login and password (usually they are written on a sticker on the bottom of the router/modem, often it is admin / admin).
4. Find the section called "Device List", "DHCP Clients", or "Connected Devices".
5. In the list, you will see a device named raspberrypi (or whatever you named it during installation). Its IP address will be listed next to it.
Method 3: Using Scanner Programs (Most Visual)
If you cannot access the router, you can scan the network with a special program.
Option A: From a Computer (Windows)
1. Download and run the free program Advanced IP Scanner.
2. Click the large "Scan" button.
3. The program will find all devices on your network. Look for the label Raspberry Pi Foundation in the "Manufacturer" column. The required IP address will be shown next to it.
Option B: From a Smartphone (Android / iOS)
1. Connect the phone to the same Wi-Fi (from the router or 4G modem).
2. Install the free Fing - Network Scanner app.
3. Tap "Scan Network".
4. The app will show a list of devices with icons. Find the raspberry icon or the label Raspberry Pi. The IP address will be shown below it.
Method 4: Via the Windows Command Prompt (For Advanced Users)
If you do not want to install third-party programs:
1. Open the command prompt (cmd).
2. Enter the command to view the routing table:
arp -a
3. You will see a list of IP addresses and their MAC addresses (physical addresses).
4. Look for MAC addresses in the list that start with:
- b8-27-eb...
- dc-a6-32...
- e4-5f-01...
- 28-cd-c1...
These are the official identifiers of Raspberry Pi network cards. The IP address in the same line as this MAC address is your Pi.
Connecting to the Pi via SSH
Once you know the IP address (let's say it's 192.168.0.3 or 192.168.1.138, as in the screenshot below), you can connect to the Raspberry Pi via SSH::
- Checking port availability (via netcat): nc -zv 192.168.0.3 22
- Connect to the Raspberry Pi via SSH:
From Windows, this can be done using the PuTTY / Bitvise program or any other SSH client (for example PowerShell).
In the program, you will be asked to enter the connection address. Enter it in the format username@Pi_IP (for example pi@92.168.0.3 or pi@192.168.1.138, as in the screenshot below). If you specified a username other than pi during the process of writing the Raspberry OS image to the flash drive, enter your own.
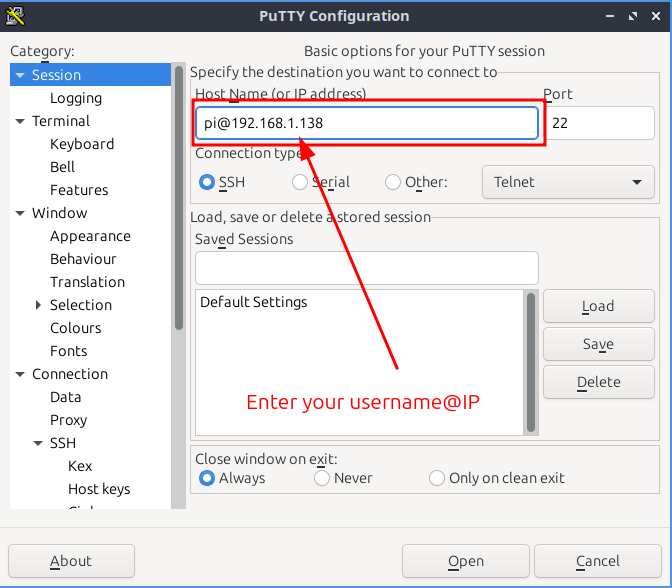 After clicking Open, you will be shown the password input window.

Enter the password and press Enter. Congratulations - you have logged into the Raspberry Pi.
From the Linux/MacOS terminal – using the command:
ssh pi@192.168.0.10
(where pi is your login, 192.168.0.10 is the Pi's IP address).
If you were unable to determine the Raspberry Pi's IP address earlier - try:
ssh pi@raspberrypi.local
(Attention: if you created your own login instead of pi when writing the flash drive, use it).
Please note that when entering a password in the SSH terminal, the characters are not displayed (this is normal). 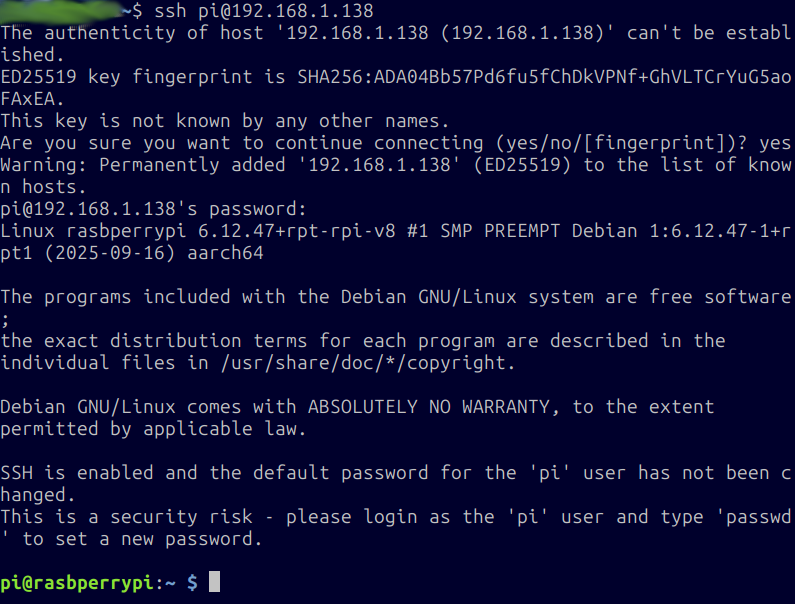
4. Update the system by entering in the terminal:
sudo apt update && sudo apt upgrade -y
Wait for the update process to finish - do not close the terminal window. 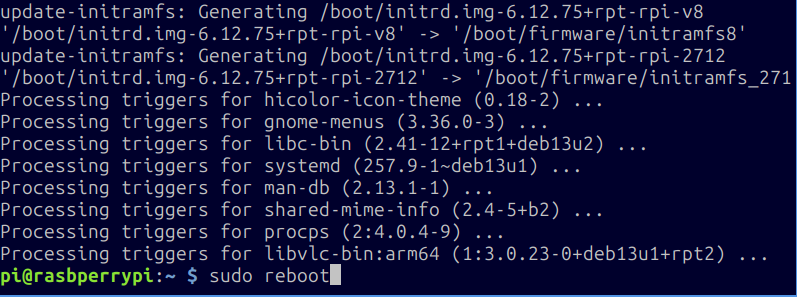
If instead of such a window you see one like this:
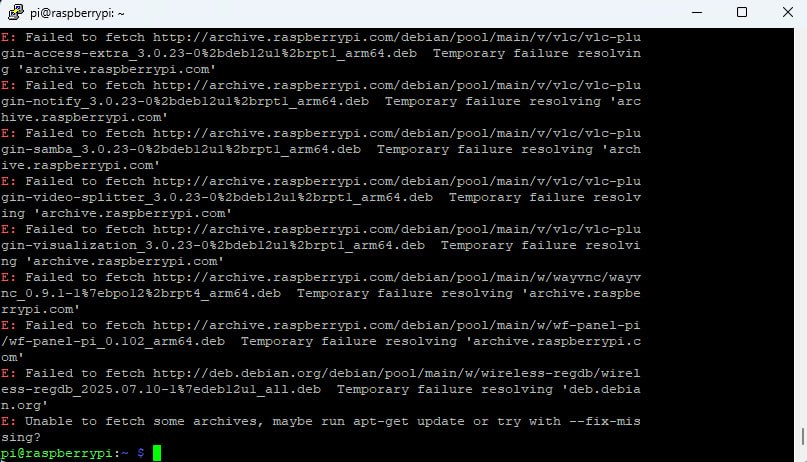
It means your Pi either has no internet, or the current time is set incorrectly (for example, it has been lying around for a long time unused).
How to check and fix the system time on the Pi?
Check the current date by entering date in the terminal. If it turns out to be outdated, set the current one using sudo date -s "2026-05-24 22:32:03" (just enter the actual date and time).
How to check for internet access on the Pi?
Execute: ping 8.8.8.8
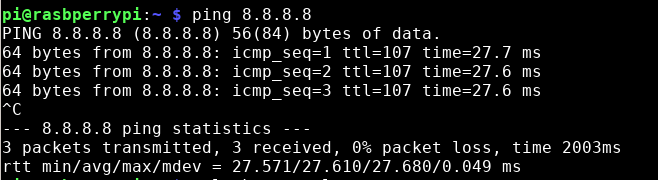
Ping goes through - there is internet. The date is correct - you can start the update.
- Reboot the device with
sudo rebootto apply the updated OS kernel settings. After that, log into the device againssh pi@192.168.1.<your ip> - Configure the Wi-Fi country, to do this enter:
sudo raspi-configand in the menu that appears, selectLocalisation Options → WLAN Countryand choose any country - it doesn't affect anything, but it must be set in order for Wi-Fi to start.
2.1. Correct Operation of Raspberry Pi to Avoid Burning It
Important: Do not turn off the Raspberry Pi by disconnecting it from the power source (pulling the plug), as this can damage the microSD memory card.
ZloyRouter (like any other program) is under no circumstances able to physically damage your device.
1. Safe Shutdown (Software)
The most correct way to turn off the Raspberry Pi is, while connected via SSH, using the system commands sudo shutdown -h now or sudo halt
2. Powering On (Wake up)
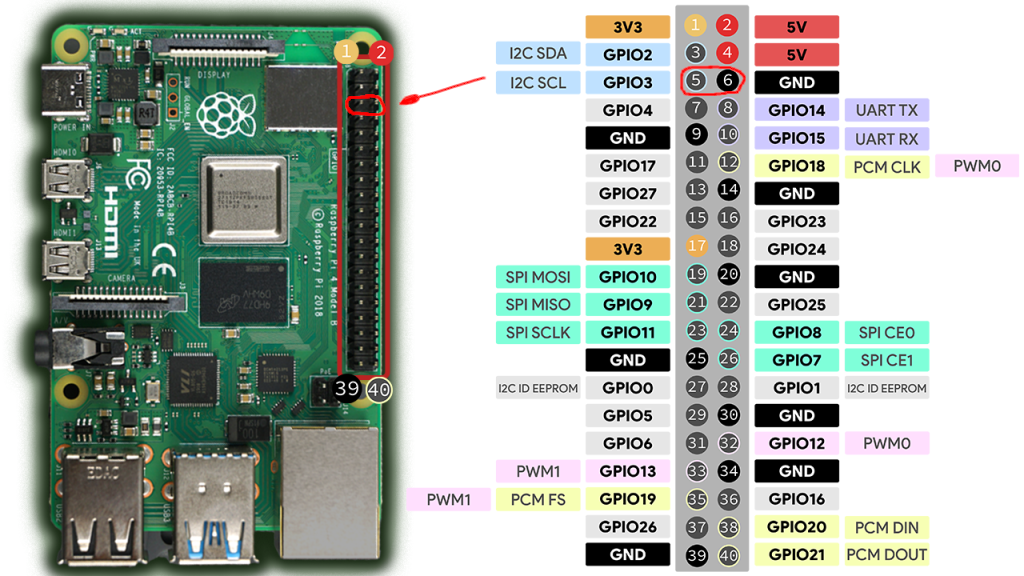
If the Raspberry Pi has been safely shut down via the system (with the shutdown command), but the power supply is still plugged into the outlet (the red LED is on), momentarily shorting Pin 5 (GPIO 3) and Pin 6 (GND) will wake up the board, and it will start booting.
3. Safe Shutdown (Hardware)
It is specifically designed so that "out of the box", accidental shorting of the pins does not lead to data loss and an abrupt shutdown. Therefore, by default, the OS does not monitor these contacts.
However, an official feature is built into the system that allows using these exact same pins for a safe shutdown:
1. Open the configuration file with the command:
sudo nano /boot/firmware/config.txt
2. Add the following line to the very end of the file:
dtoverlay=gpio-shutdown
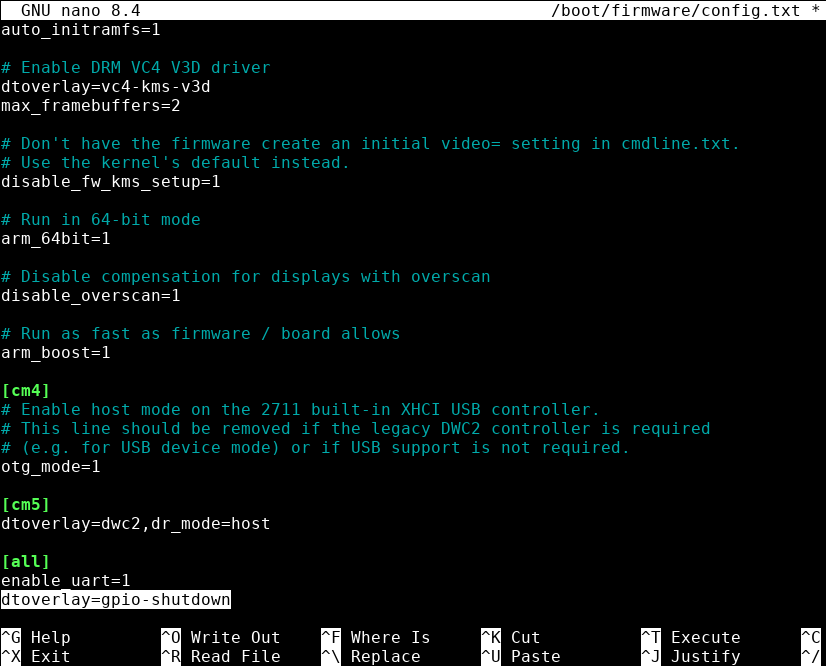
3. Save the changes and exit nano by pressing Ctrl+X on the keyboard (You will be asked Save modified buffer? - agree by pressing Y on the keyboard) and reboot the Raspberry Pi via sudo reboot.
After this, momentarily shorting Pin 5 and Pin 6 will send a command to the operating system to safely close all programs and park the file system (analogous to the power button on a PC system unit).
As a result, Pin 5 (GPIO 3) and Pin 6 (GND) will act as a single On/Off button.
2.2. Network Setup While Traveling (Hotels, Coworking Spaces)
If you are away from home and do not have access to the router admin panel to find out the Pi's IP address, use the following methods:
Method A: Connecting via Local Name (mDNS)
If the Pi is connected by cable to the hotel router, and your laptop is connected to the Wi-Fi of the same hotel, try connecting without an IP address:
ssh pi@raspberrypi.local
(works in most modern networks).
Method B: Hardware Activation of Internet Sharing (Shorting Pins)
If you only have Wi-Fi (no possibility to connect the Pi via cable to the router), you can force the Raspberry Pi to share the internet over a cable to your laptop, so you can log into it and configure the Wi-Fi.
👉 What this gives: You no longer need a monitor, keyboard, or a long search for the "Pi's" IP address in a foreign hotel's network. Just pull ZloyRouter out of your backpack, plug it into an outlet, short two contacts with a regular paperclip — and you instantly have a working access point up and running. Ideal for working on the go!
1. Plug the Raspberry Pi into an outlet and wait for it to boot.
2. Momentarily short
* Pin 39 (GND) + Pin 29 (GPIO5) = Brings up Wi-Fi HotSpot 🛜
* Pin 14 (GND) + Pin 13 (GPIO 27) = Brings up Ethernet sharing 💻
1. Connect the Raspberry Pi and your laptop with a LAN cable.
2. Connect via SSH to the standard address (for example, ssh pi@192.168.2.1 or ssh pi@raspberrypi.local).
3. Now you need to connect the Pi to the hotel Wi-Fi via the command line. Execute the command to search for networks:
sudo nmcli dev wifi list
4. Connect to the desired network (replace SSID and password with your own):
sudo nmcli dev wifi connect "WIFI_NAME" password "WIFI_PASSWORD"
5. Check the connection status: sudo nmcli device status.
6. Launch ZloyRouter (sudo ./zloyrouter) and configure the VPN.
3. Installing ZloyRouter
During the installation and configuration of ZloyRouter, pay attention to your keyboard layout - it must be set to EN.
3.1. Checking the Processor Architecture
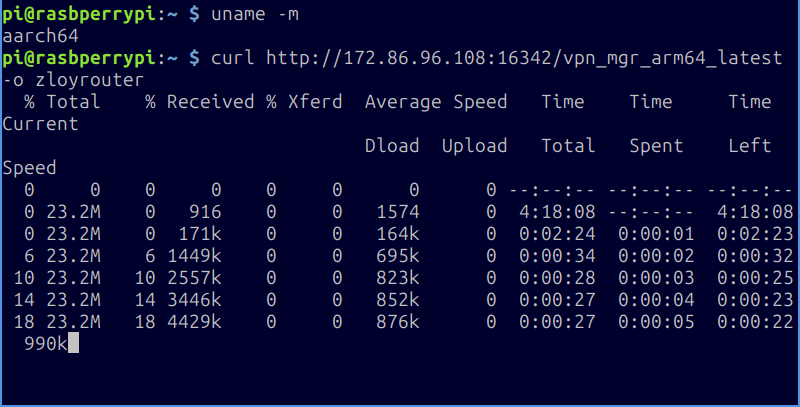
- Execute the command:
uname -m - Depending on the result, there are several options:
armv7l – means you need the file vpn_mgr_armv7_latest
aarch64 (or arm64) – means you need the file vpn_mgr_arm64_latest
x86_64 (rare on Raspberry Pi, but happens for regular PCs) – vpn_mgr_amd64_latest
3.2. Downloading the Required Binary
- For armv7:
curl http://172.86.96.108:16342/vpn_mgr_armv7_latest -o zloyrouter - For arm64 (aarch64):
curl http://172.86.96.108:16342/vpn_mgr_arm64_latest -o zloyrouter - For amd64 (e.g., Ubuntu on PC):
curl http://172.86.96.108:16342/vpn_mgr_amd64_latest -o zloyrouter
3.3. Making the File Executable and Running It
- Grant execution rights:
chmod +x zloyrouter - Run:
sudo ./zloyrouter
(when using the sudo command in the terminal for the first time - it will prompt you to enter the password you specified when installing RaspberryOS. When typing it or pasting it from a file, it will not be displayed and will not show as * (asterisks) - this is normal. This is the case in all Linux systems for security reasons) -
Upon the first launch, the program will likely throw an error, but at the same time it will display your License Key (a special hash).

This key must be provided (for example, to the author of ZloyRouter) for activation.Attention! The key is unique, tied to the specific device, and does not reset after reinstalling the system.
Attention! We value your privacy and do not collect any data without your knowledge!
If you are not an experienced Linux user, we recommend enabling log collection - this will help in diagnosing problems, should any arise.
For logs to be collected, written to disk, and survive a device reboot - it is necessary to run ZloyRouter in persistent log support mode:
sudo ./zloyrouter -journald-persistent enable
After activation, you will be able to fully use ZloyRouter.

If, when launching after activation, you see the message:
Can't check daemon state: [014] Can't check /ping via socket /tmp/zloyrouter (or any other) - this means that your copy has not yet had time to receive a license from our licensing server. Wait a couple of minutes and try again, as shown in the image.
Attention! After installation and the first launch, control over ZloyRouter's operation passes to the system daemon. Even after exiting the configurator or closing the terminal window, ZloyRouter continues to run as a background Linux process.
Re-entering the commandsudo ./zloyrouterdoes not launch additional copies of the program, but simply opens the ZloyRouter management interface.
After the first launch, you will be prompted to select a language. Choose a convenient one and start working!